

Tee Installation
Proper Tee Design and Construction
Tees should always be as level as possible, not sloping more than 1/2 inch per linear foot, or no more than 6” from front to back of a 12 foot tee. Tees should also be level from side to side, and should not slope off sharply in front of the pad. Ideally, the pad is on flat level ground with three feet of flat level space in front and to the sides, and six feet to the rear for those who like to approach the pad with some momentum. Edges of the pad should not drop off sharply, especially on long open holes which may require a follow through. Properly installed tees will increase enjoyment and safety on your course.

Tee Area Layout
A: Minimum distance from edge of tee to an obstacle is three feet providing a clean release when throwing.
B: Area in front of the tee should be a smooth transition to facilitate a smooth and complete follow-through.
C: Tee sign should face players approaching tee from previous hole. The tee sign should be visible from the tee.
D: Bench (if installed) should be behind the tee. Not too close, some players use a “run-up” when they throw drives.
E: Trash cans will minimize litter.
F: Path to hole should be behind tee.
G: Run-up area.
Installing Tee Pads
One of the most critiqued components of a disc golf course are the available tees. A well built textured concrete tee can reduce negative impressions. The tee usually consists of a flat, level area about five to six feet wide by eight to fifteen feet long. Unlike golf, where players are stationary during the drive, disc golf drives can utilize a walk-up or run-up to generate more power and momentum. Creating an ideal surface for players to throw from will make your course more appealing to new and experienced players alike.
Concrete tees represent the professional standard for disc golf. They require little maintenance when installed correctly. With the right tools, you can create a textured surface that allows players sure footing in most weather conditions. Concrete tees require some preparation and labor to install, but the investment produces a superior tee surface preferred by a wide range of players.
Concrete Tee Pad Installation
Prior to Tee Pouring:
- Your tee area should be as level as possible. Grading the ground for the tee will create the most stable surface. A level tee provides players with a consistent surface to throw from.
- Flag out the corners of your tee. The tee should be square with the center of the fairway, not necessarily the target. The tee should be between five and six feet wide, and eight to fifteen feet long. You can conserve with smaller pads (5’x8′) on short wooded holes, but many players appreciate larger tees (6’x12′) on longer, more open holes.
- Dig out the rectangle that designates your tee area. Create a three inch deep base dug out of the ground. The base should allow you to frame with 2x4s and be just above the surface of the ground. This prevents the tee from being washed over during heavy rain.
- Stake down the edges of the outer frame and use deck screws to secure the corners together. Check for level at the ground plane. Add or subtract under the frame to create a level square tee area. Backfill under the frame to prevent concrete from leaving the form during tee pouring.
- Optional but recommended: In heavy use areas, it may be pertinent to lay down a section of reinforcing wire mesh or rebar to strengthen the pad and prevent cracking from vehicle traffic.
-
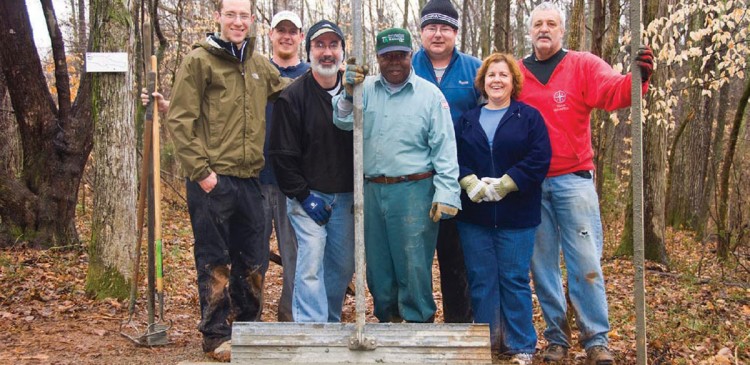
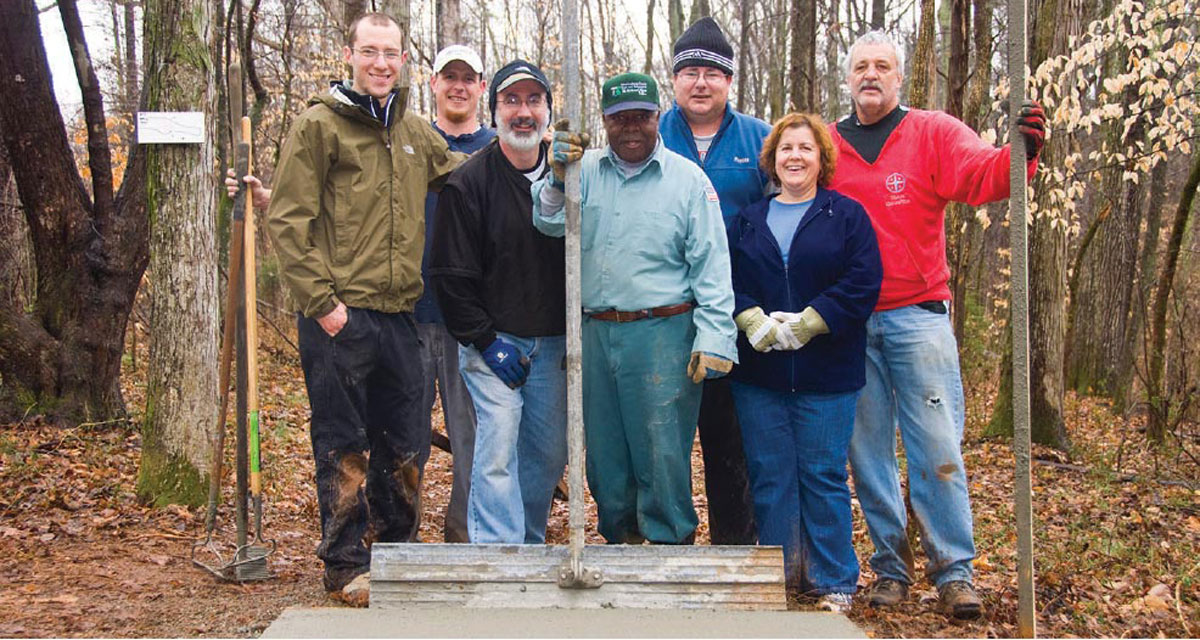
- A prepared crew of workers makes tee construction easy.
-
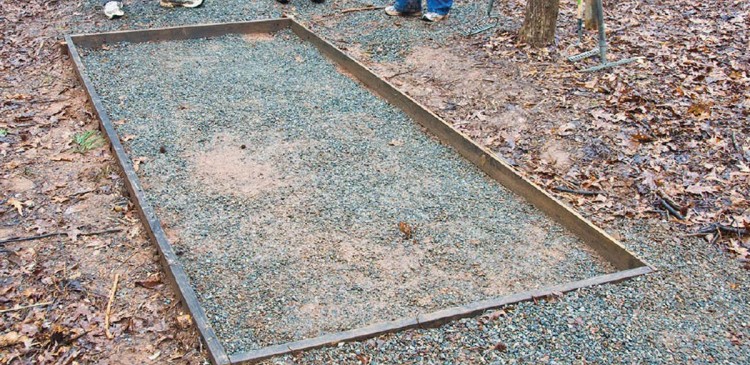
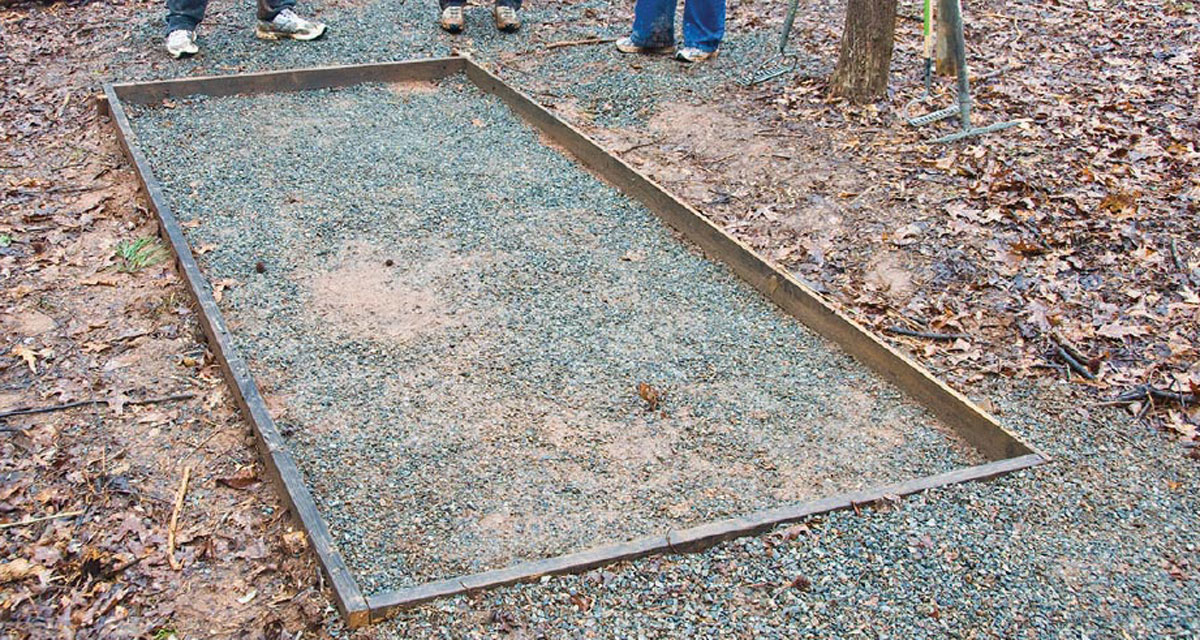
- A level form is best for sure footing. At or slightly above grade is ideal. Frame is ready for concrete.
-
- Once enough concrete is in the form, use 2×4 to screed, filling all areas.
-
- As you screed, you may need to fill in low areas with excess concrete.
-
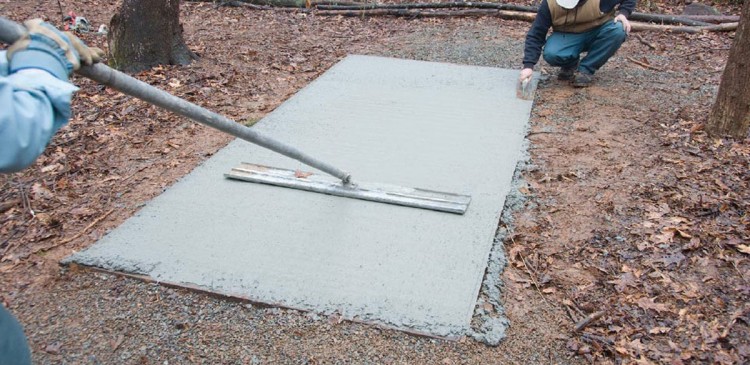
- Float the concrete to force rocks down. It will help with texturing.

-
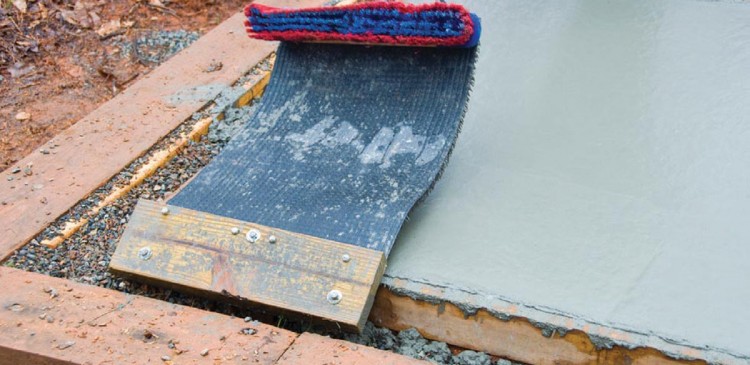
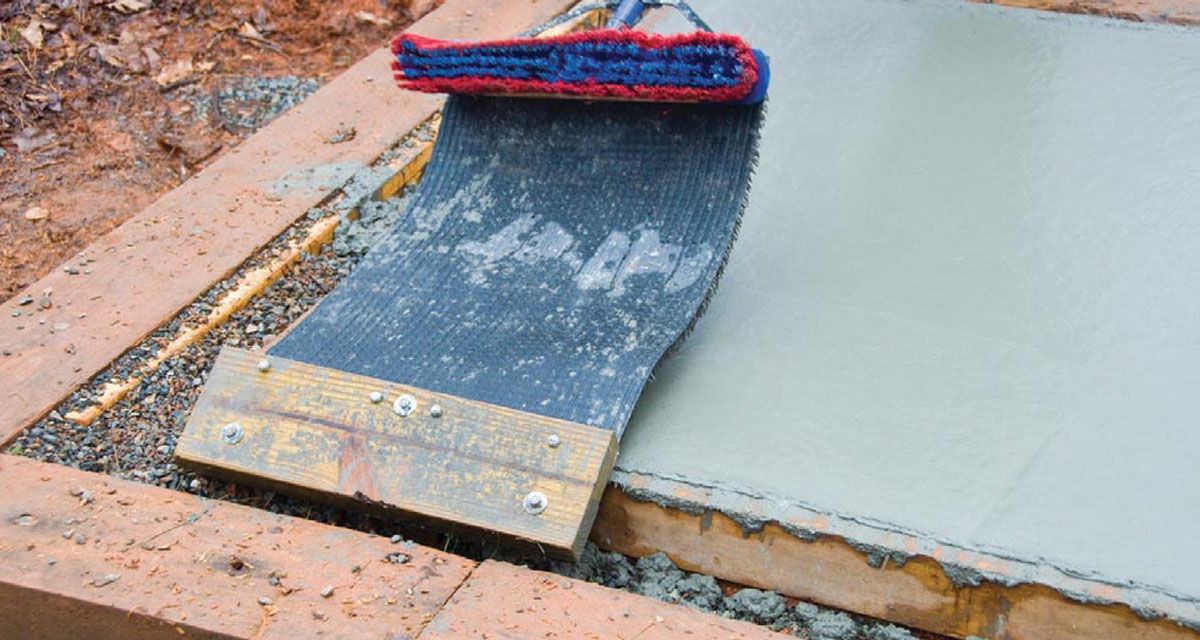
- The texture tool: broom, a few screws, washers, a 2×6, and AstroTurf mat. Drag the texturing tool across the pad from the side.
Day of Tee Pouring:
- Have the proper tools and a crew of workers: Concrete sets quickly, so it’s better to have more people come, even if they end up standing around. Gravel rakes, shovels, a 2×4 two feet wider than the tee width as a screed, a trowel, a concrete float, wheel barrows, tee texturing tool (see inset). A large labor force can install a lot of tees in a short amount of time. With enough wheelbarrows and shovels and rakes, eighteen tees can be poured in about four hours.
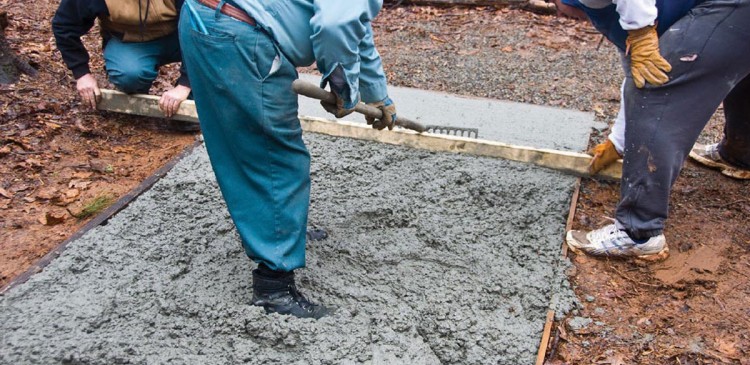
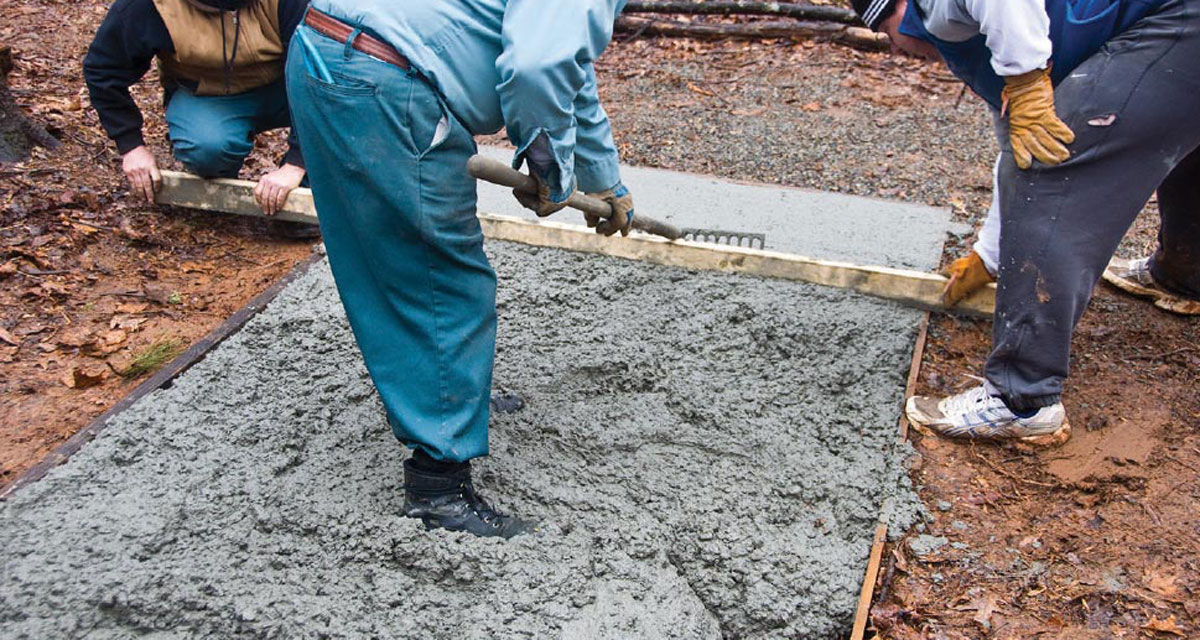
- Organize into teams. One well prepped person per team and a few laborers to move concrete. Pour concrete into form until just slightly overfull. Use rakes to compress concrete in corners and remove air. Rest the 2×4 across the front of the tee. Start “sawing” back and forth while slowly moving the 2×4 towards the back of the tee. This makes sure there is enough concrete for a nice level pad. If there are any gaps under the 2×4, fill them in with additional concrete and keep going until you have covered the entire tee. Excess concrete gets pushed off the end of the form.
- Float the concrete. The float is used to create a smooth surface, and to push down the rocks in the aggregate. This is important so they won’t be pulled up during texturing. This is a job for your most experienced person.
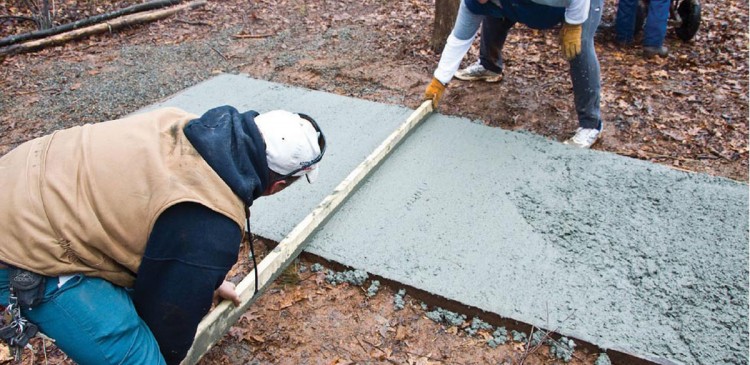
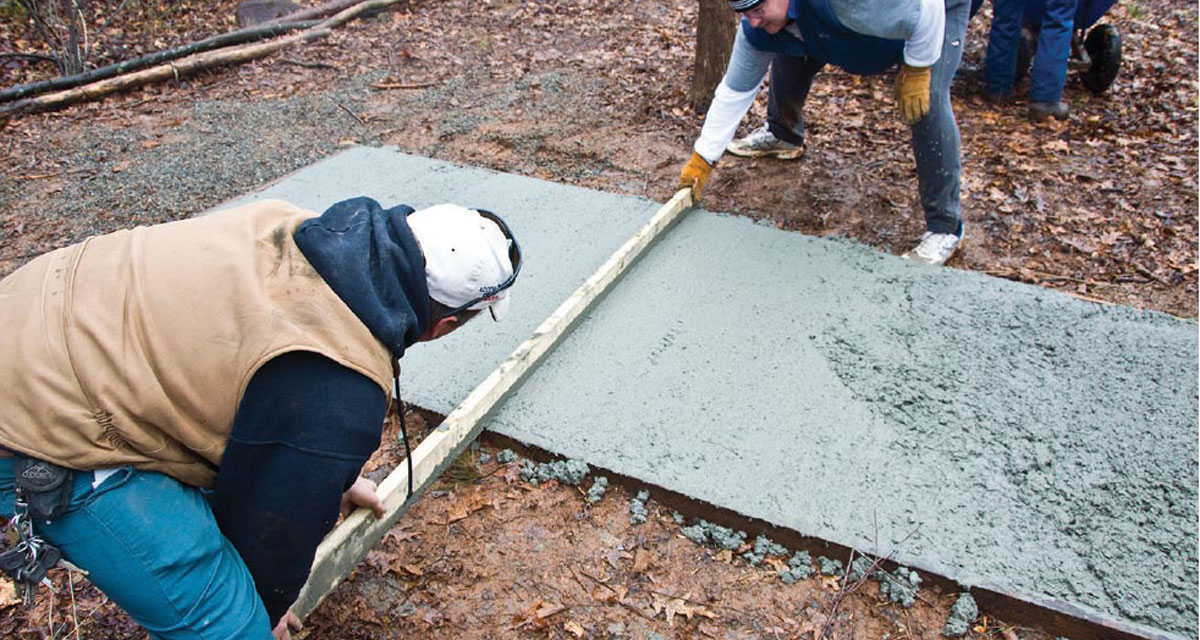
- As the concrete goes from soupy to sticky, maybe 40 to 60 minutes, it’s time to apply the texture. From the side, take the texturing tool and drag it gently across the tee. This texture will provide players with optimal traction in all conditions. In busy parks, it may be important to guard your tees while they set to prevent concrete graffiti.
After Tee Pouring
In a day or so, your tees will be set. The frames can remain if you like, but wait a week to remove them. Backfill dirt around the tee to create a smooth transition on and off your tee pad.


